Turning an old hoodie into a fresh, wearable piece is one of the most satisfying beginner-friendly DIY clothing projects. The idea is simple: remove the hood, reshape the neckline, and transform a casual sweatshirt into something that feels lighter, cleaner, and more versatile. This kind of easy sewing DIY is perfect for anyone who loves upcycled fashion, quick wardrobe makeovers, and creative ways to reuse clothing that might otherwise sit untouched in the closet.
A hoodie refashion project is especially appealing because it does not require a complicated pattern or advanced tailoring skills. With careful cutting, basic hand stitching or machine sewing, and a little patience, a bulky hoodie can become a relaxed crewneck sweatshirt, a cropped pullover, or a custom lounge top. The best part is that every piece turns out slightly different, which gives your DIY clothing project a personal, handmade feel.
Key Takeaways
- Removing a hood can instantly turn a hoodie into a cleaner crewneck-style sweatshirt.
- This is a great beginner sewing project because it uses an item you already own.
- Sharp scissors, pins, and slow cutting help create a neater neckline.
- The raw edge can be finished with a hem, binding, ribbing, or a simple stitch.
- Upcycling clothes is budget-friendly, creative, and perfect for personal style experiments.
Why Hoodie Refashion Projects Are So Popular
Hoodies are comfortable, cozy, and practical, but sometimes the hood can feel too bulky. It may bunch up under jackets, create extra weight around the neckline, or simply not match the look you want. That is why cutting off the hood has become a popular DIY clothing hack. It gives an old sweatshirt a cleaner shape and makes it easier to style with jeans, leggings, skirts, or layered outfits.
For people who enjoy sewing easy DIY projects, this kind of transformation offers a quick win. You do not need to create a garment from scratch. Instead, you are working with an existing sweatshirt that already has sleeves, seams, fabric structure, and a finished body. Your main focus is adjusting the neckline and finishing the edge so the final result looks intentional rather than rushed.
Important: The biggest difference between a messy clothing hack and a polished DIY sweatshirt makeover is the neckline finish. Take your time around the collar area, because this is where the eye naturally lands when the piece is worn.
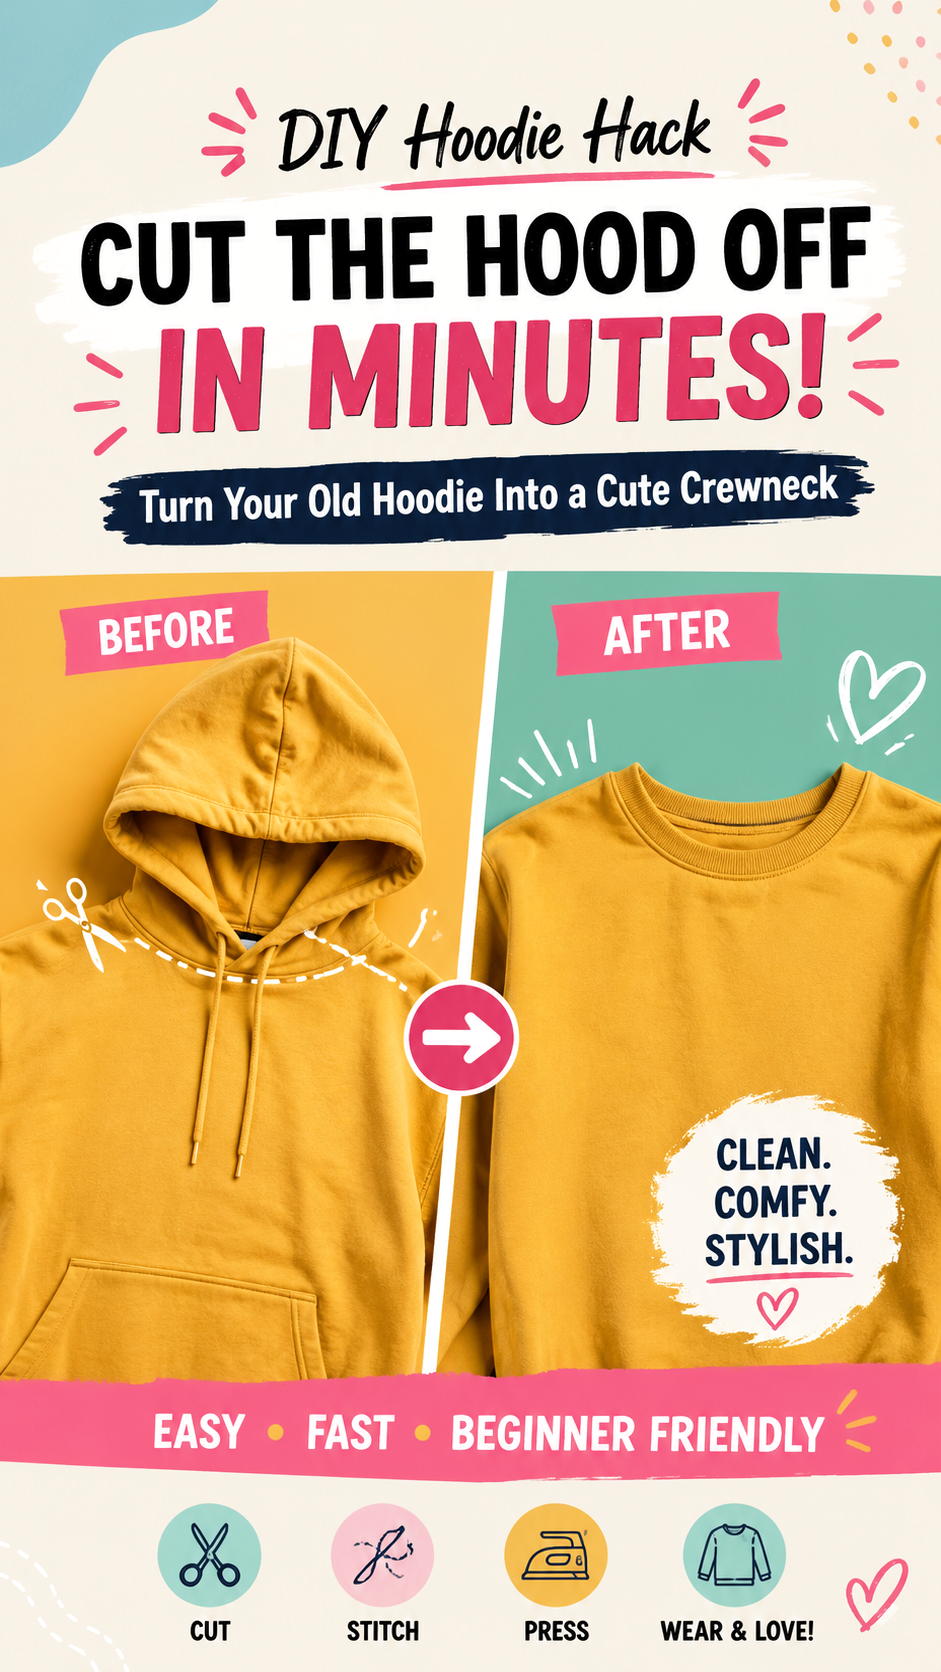
The Core Idea: Turn a Hoodie Into a Crewneck
The visual concept is clear and instantly useful: a hooded sweatshirt is being cut along the hood seam to remove the hood and create a new neckline. This is a classic hoodie cutting hack that can turn a casual pullover into something closer to a crewneck sweatshirt. It is practical, creative, and ideal for anyone who likes DIY fashion without overly complicated steps.
The appeal comes from the surprise factor. Many people own hoodies they no longer wear, but they may not realize that the same garment can become a totally different piece. Removing the hood changes the silhouette. It reduces bulk, opens up styling options, and can make the sweatshirt feel more modern.
This project also works well for damaged hoodies. If the hood drawstring is missing, the hood is stretched out, or the hood lining feels worn, cutting it off can save the rest of the sweatshirt. Instead of throwing the piece away, you can refashion it into something useful.
Supplies You Need for an Easy Hoodie Makeover
You do not need a large sewing kit to start this DIY sweatshirt transformation. A few basic tools are enough to make the process smoother and more accurate. Since sweatshirt fabric can stretch, sharp tools and careful handling matter.
- An old hoodie or sweatshirt with a hood
- Sharp fabric scissors
- Sewing pins or clips
- Measuring tape or ruler
- Fabric chalk or washable marker
- Needle and thread, or a sewing machine
- Optional rib knit, bias tape, or matching fabric for finishing the neckline
- Iron for pressing the finished edge
If you are new to sewing, fabric scissors are one of the best tools to invest in. Regular craft scissors can chew through fabric and leave uneven edges. Clean cuts make the finishing step much easier.
Before You Cut: Plan the Neckline
One of the most common mistakes in hoodie refashion projects is cutting too much fabric too quickly. Once fabric is removed, you cannot put it back without adding another material. Before cutting, lay the hoodie flat on a table and smooth out the shoulder seams, neckline, and hood.
Look closely at where the hood is attached to the sweatshirt body. Many hoodies have a seam that joins the hood to the neckline. This seam can act as a guide. Cutting just above or beside that seam helps you remove the hood while preserving the sweatshirt’s natural neckline shape.
Pro Tip: Cut less than you think you need at first. You can always trim more fabric later, but a neckline that is cut too wide may lose its structure and sit awkwardly on the shoulders.
Try It On First
Before making any cuts, put the hoodie on and check how the neckline sits. Notice where the hood feels bulky and where you would like the new collar to fall. Mark small points with chalk if needed. This helps you avoid cutting too deep in the front or too high in the back.
Use the Existing Seam as a Guide
The hood seam is often the safest cutting line for beginners. It gives you a natural curve and keeps the project manageable. If the hoodie has thick stitching, cut slowly and avoid pulling the fabric as you go.
How to Cut the Hood Off a Hoodie
Start by placing the hoodie on a flat surface with the front facing up. Smooth the fabric so the hood lies evenly. The goal is to remove the hood cleanly while keeping the neckline symmetrical.
- Lay the hoodie flat and align the shoulder seams.
- Find the seam where the hood connects to the sweatshirt.
- Pin around the neckline to keep the layers steady.
- Begin cutting slowly along the seam line.
- Work in small sections instead of long, rushed cuts.
- Remove the hood and check the neckline shape.
- Trim any uneven areas carefully.
After cutting, the neckline may look unfinished. That is normal. The next step is deciding how you want to finish the edge. Some DIY styles keep a raw edge for a casual look, while others use stitching or ribbing for a cleaner result.
Best Ways to Finish the New Neckline
The neckline finish determines how professional the final sweatshirt looks. If you want a polished DIY sewing project, do not stop right after cutting. Even a simple folded hem can make a big difference.
Option 1: Fold and Stitch the Edge
This is one of the easiest methods for beginners. Fold the raw edge slightly inward, pin it in place, and sew around the neckline. Use small stitches if sewing by hand, or use a stretch-friendly stitch if using a sewing machine. This method creates a simple, clean collar.
Option 2: Add Rib Knit Binding
For a more traditional crewneck sweatshirt look, add rib knit around the neckline. Ribbing has stretch, which helps the collar sit comfortably. This method takes a little more sewing skill, but it can make the transformation look store-bought.
Option 3: Use Bias Tape or Fabric Binding
Binding the edge with fabric tape can create a neat finish and add contrast. Choose a color that matches the sweatshirt for a subtle look, or use a contrasting fabric for a bold DIY fashion detail.
Option 4: Leave a Raw Edge for a Casual Look
A raw edge can work if the sweatshirt fabric does not fray heavily. This gives the piece a relaxed, streetwear-inspired finish. However, it may curl over time, especially after washing. If you like a clean look, stitch the edge instead.
Expert Insight
Sweatshirt fabric usually has stretch, so the neckline should not be pulled tight while sewing. Let the fabric relax naturally under the needle. This helps prevent ripples, puckering, and an uneven collar shape.
Beginner Sewing Tips for a Cleaner Result
Even though this is an easy DIY sewing project, a few small details can make your hoodie makeover look more polished. The goal is not perfection. The goal is a wearable piece that looks intentional and feels comfortable.
Pin Before Sewing
Pins or sewing clips help keep the folded edge steady. This is especially useful around curves, where fabric can shift. Place pins close enough together to guide the shape without stretching the neckline.
Use Matching Thread
Matching thread hides beginner stitches and gives the sweatshirt a cleaner finish. If you want a decorative look, contrast thread can work, but it will make every stitch more visible.
Press the Edge
An iron can help shape the neckline before sewing. Pressing the folded edge makes it easier to stitch evenly. Use a heat setting suitable for the fabric, especially if the sweatshirt has printed graphics.
Sew Slowly Around Curves
Curved necklines require patience. Slow sewing gives you more control and helps prevent jagged stitching. If using a machine, pause often and adjust the fabric gently.
Creative Variations for Your DIY Sweatshirt
Once the hood is removed, you can keep the makeover simple or add more custom details. This is where the project becomes personal. A basic hoodie can turn into a trendy, cozy, or playful sweatshirt depending on your style.
Make It Cropped
If you like cropped sweatshirts, trim the bottom hem after removing the hood. Try the sweatshirt on first and mark the length before cutting. A cropped crewneck pairs well with high-waisted jeans, joggers, or skirts.
Add a V-Notch Detail
A small V-notch at the center front can give the neckline a sporty vintage feel. Keep it shallow and finish the raw edges with stitching to prevent stretching.
Turn It Into an Off-Shoulder Sweatshirt
For a relaxed lounge look, you can widen the neckline slightly. Be careful with this variation, because cutting too wide may cause the sweatshirt to slide too much. Start small and adjust gradually.
Add Patches or Embroidery
After the neckline is finished, personalize the sweatshirt with patches, embroidery, or small fabric appliques. These details can cover worn areas and make the piece feel completely new.
Important: When upcycling clothes, let the original garment guide the design. A bold printed hoodie may only need a simple neckline change, while a plain sweatshirt can handle extra details like patches, stitching, or contrast binding.
Why This Project Is Great for Sustainable Fashion
Easy DIY clothing projects are not only fun. They also encourage a more thoughtful approach to fashion. Instead of buying something new every time your style changes, you can rework pieces you already own. A hoodie that feels outdated can become a favorite sweatshirt with just one simple transformation.
Upcycling also helps reduce textile waste. Many garments are discarded because of small style issues rather than true damage. If the fabric is still comfortable and wearable, a refashion project can extend its life. This makes hoodie cutting hacks especially useful for anyone interested in sustainable style, budget-friendly fashion, and low-waste creativity.
There is also a confidence-building element. Completing a simple sewing DIY makes future projects feel less intimidating. Once you learn how to cut, pin, and finish a neckline, you can apply similar skills to T-shirts, sweatshirts, cardigans, and other wardrobe pieces.
Common Mistakes to Avoid
Hoodie refashion projects are beginner-friendly, but a few mistakes can make the final result less wearable. Knowing what to avoid will help you get a better outcome.
Cutting While Holding the Fabric in the Air
Always cut on a flat surface. Holding the hoodie up while cutting can stretch the fabric and create an uneven neckline.
Skipping the Try-On Step
Trying on the sweatshirt before and during the process helps you control the fit. The neckline may look different on a table than it does on your body.
Using Dull Scissors
Dull scissors can drag the fabric and leave choppy edges. Sharp fabric scissors create a cleaner cut and reduce the amount of trimming needed later.
Stretching the Neckline While Sewing
Pulling the fabric as you sew can make the neckline wavy. Guide the fabric gently and let the machine or needle do the work.
How to Style Your New Crewneck Sweatshirt
Once your hoodie has been transformed, it becomes much easier to style. Without the hood, the sweatshirt can layer smoothly under jackets and coats. It also looks cleaner with necklaces, scarves, or collared shirts underneath.
For a casual everyday look, wear your DIY crewneck with denim and sneakers. For a cozy outfit, pair it with joggers or soft knit pants. If you cropped the sweatshirt, style it with high-waisted trousers or a fitted skirt. The new neckline gives the piece a more flexible shape, so it can move beyond basic loungewear.
If the sweatshirt has a bold color or graphic, keep the rest of the outfit simple. If it is plain, use accessories to add personality. This balance helps your upcycled sweatshirt look styled instead of accidental.
Hand Sewing vs. Machine Sewing
You can finish this project by hand or with a sewing machine. Both methods can work, depending on your tools and comfort level.
Hand Sewing
Hand sewing is slower, but it gives you control. It is a good option if you do not own a sewing machine or if you only need to secure a small folded edge. Use even stitches and strong thread.
Machine Sewing
A sewing machine creates a stronger, faster finish. For sweatshirt fabric, use a stitch that allows slight stretch. A narrow zigzag stitch can work well for many knit fabrics. Test on a scrap piece from the removed hood if possible.
The removed hood fabric is useful for practice. Before sewing the actual neckline, test your stitch length, tension, and thread color on the fabric you cut away. This helps you avoid surprises on the finished garment.
What to Do With the Removed Hood
Do not throw away the hood right away. The extra fabric can be used for other small DIY sewing ideas. Since it matches the sweatshirt, it is perfect for repairs or decorative details.
- Use it to test stitches before sewing the neckline.
- Cut small patches for worn areas.
- Create a pocket detail or applique.
- Save the drawstring for another craft project.
- Use the fabric as a cleaning cloth if it is not needed for sewing.
This small habit makes your upcycling project even more resourceful. It also gives you matching fabric in case you need to fix a mistake.
At a Glance
- Best project type: beginner sewing and clothing upcycle
- Main transformation: hoodie to crewneck sweatshirt
- Most important tool: sharp fabric scissors
- Best finish: folded hem, ribbing, or fabric binding
- Style result: cleaner, lighter, and easier to layer
Is This DIY Hoodie Hack Worth Trying?
Yes, especially if you have a hoodie that you like but do not wear often. This sewing easy DIY project is low-cost, practical, and beginner-friendly. It teaches useful skills without requiring a full garment construction process. You can practice cutting fabric, shaping a neckline, pinning curves, and finishing edges, all while creating something wearable.
The project is also very forgiving when approached slowly. If you are nervous, begin with a hoodie you do not mind experimenting on. Once you understand the process, you can try the same technique on a sweatshirt you love.
For anyone building a DIY fashion habit, this is a great starting point. It shows how a small change can completely refresh a garment. It also encourages you to look at old clothes with more creativity and less waste.
Conclusion: A Simple Cut Can Create a Whole New Sweatshirt
Removing the hood from a hoodie is a simple idea with a big style payoff. With careful cutting and a clean neckline finish, an old sweatshirt can become a fresh crewneck that feels easier to wear and style. This kind of easy sewing DIY is perfect for beginners, upcyclers, and anyone who loves practical clothing hacks.
Whether you keep the neckline simple, add ribbing, crop the hem, or personalize the sweatshirt with patches, the result is a custom piece that reflects your own style. Start slowly, cut carefully, and enjoy the process of turning something ordinary into something new. Sometimes the best DIY fashion projects begin with one brave cut and a little creative confidence.
Tags
Sewing Easy DIY Hoodie Refashion DIY Sweatshirt Upcycled Clothing Beginner Sewing Clothing Hacks DIY Fashion