Halloween decorating is all about creating memorable displays that capture the excitement of the season. If you are looking for a project that combines creativity, craftsmanship, and festive charm, a stacked skeleton pumpkin display is an outstanding choice. By transforming ordinary pumpkins into a glowing skeleton figure, you can create a front porch centerpiece that impresses guests during the day and becomes even more eye-catching after sunset. This creative pumpkin carving idea blends traditional jack-o’-lantern techniques with clever design, making it a favorite among DIY Halloween enthusiasts.
Whether you are decorating your porch, preparing for a Halloween party, or simply searching for fresh pumpkin ideas carving inspiration, this project offers endless opportunities to personalize your seasonal décor. From spooky expressions to glowing skeletal details, every carved pumpkin contributes to an unforgettable display.
Key Takeaways
- Create a dramatic Halloween decoration using stacked carved pumpkins.
- Combine facial expressions and skeletal patterns for maximum visual impact.
- Use safe LED lights or battery candles for long-lasting illumination.
- Choose pumpkins of different sizes for better balance and stability.
- Personalize the design with unique carving styles and creative details.
Why Skeleton Pumpkin Stacks Are Trending
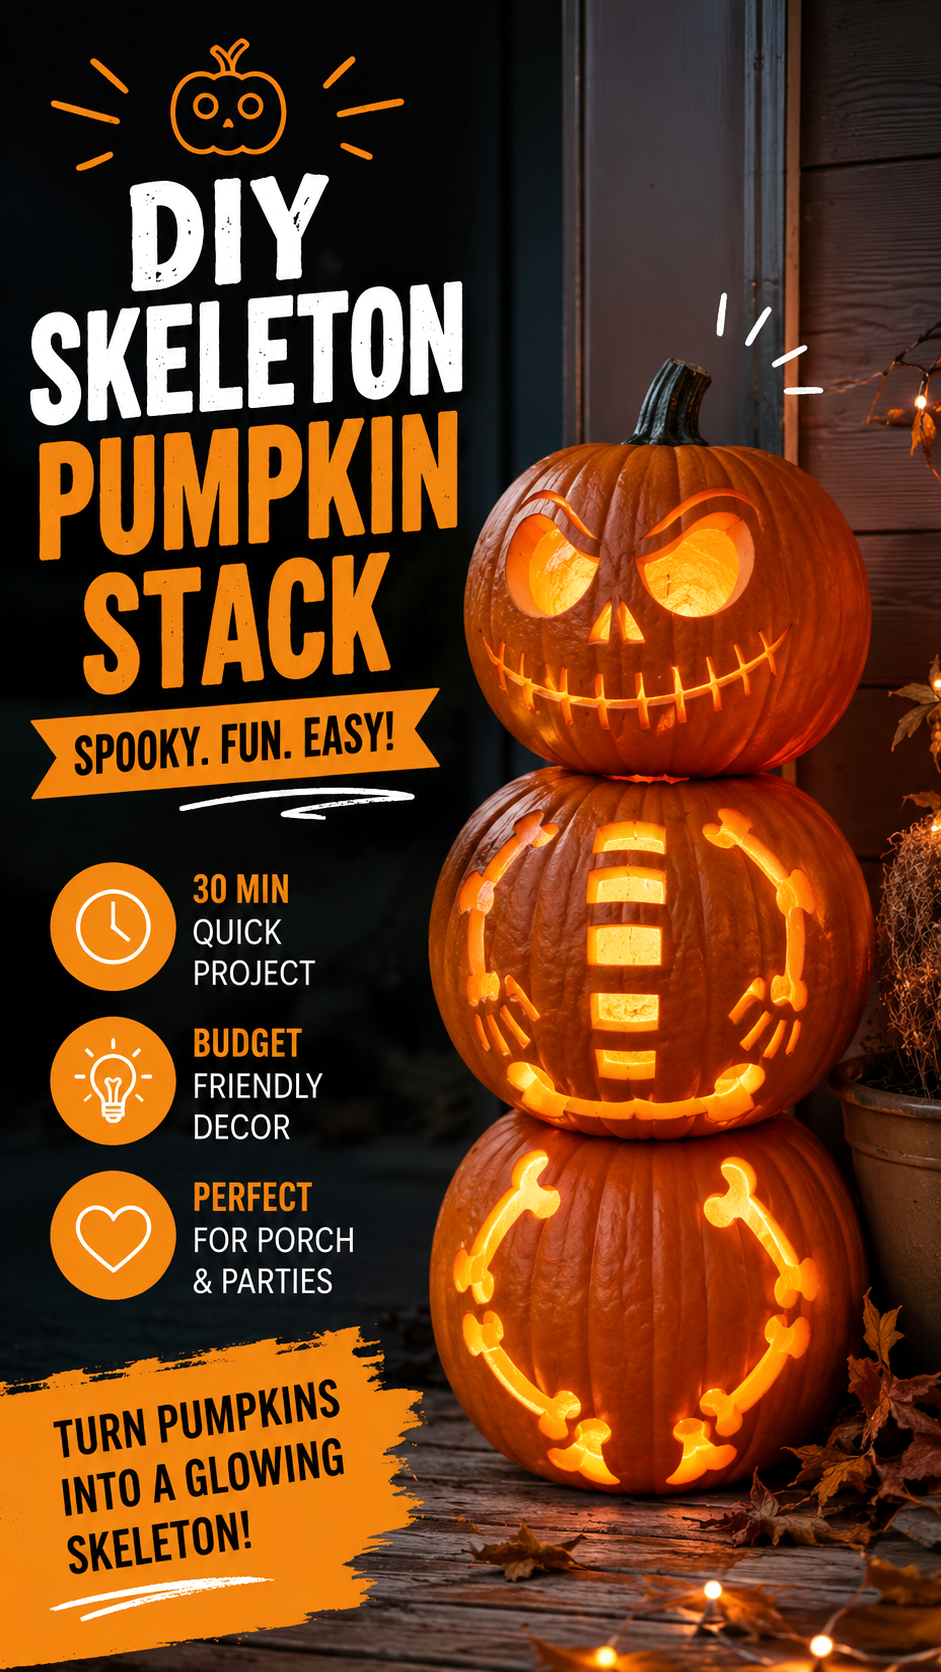
Traditional jack-o’-lanterns never go out of style, but stacked pumpkin displays add an entirely new level of creativity. Instead of decorating with a single carved pumpkin, multiple pumpkins work together to create one large decorative figure that instantly becomes the focal point of any porch or entryway.
Many homeowners love this style because it transforms simple carving into a larger artistic project. The combination of glowing facial features, skeletal body sections, and carefully arranged pumpkins creates an impressive illusion without requiring expensive decorations.
Important: One of the biggest advantages of a stacked pumpkin design is its flexibility. Even beginner carvers can simplify the skeleton details while experienced artists can add intricate bones, ribs, fingers, and facial expressions for a more dramatic result.
Planning Your Pumpkin Display
Before carving begins, spend time planning the entire arrangement. Since each pumpkin becomes one section of the finished character, thinking ahead helps produce a more balanced final display.
Choose Pumpkins in Graduated Sizes
Select three pumpkins that gradually increase or decrease in size depending on the look you want. A larger base creates stability while a medium pumpkin works well for the torso. The smallest pumpkin typically becomes the head.
- Large pumpkin for the lower body
- Medium pumpkin for the rib cage and arms
- Small pumpkin for the expressive face
Pick Healthy Pumpkins
Fresh pumpkins with firm skin are easier to carve and last longer throughout the Halloween season. Avoid soft spots, mold, cracks, or bruises whenever possible.
Designing the Skeleton Face
The top pumpkin usually attracts the most attention because it serves as the character’s face. Large glowing eyes, an expressive smile, and dramatic eyebrows immediately establish the spooky personality of the display.
You can experiment with different emotions including:
- Mischievous grin
- Classic scary smile
- Wide-eyed surprised expression
- Angry Halloween monster face
- Playful cartoon skeleton look
Keeping the facial features oversized helps them glow brightly after dark while making the pumpkin easier to carve.
Expert Insight
Sketch your design with a washable marker before carving. This simple step makes it easier to maintain symmetry and prevents accidental cuts that are difficult to correct.
Creating the Skeleton Body
The center pumpkin brings the entire character to life. Instead of carving random shapes, think about how a skeleton would naturally appear. A vertical spine combined with curved ribs immediately creates the illusion of a glowing skeleton.
Simple Skeleton Elements
- Curved ribs along each side
- Vertical spine running through the center
- Small shoulder bones
- Hand bones extending outward
- Neck connection between pumpkins
Leaving enough pumpkin flesh between each carved section helps maintain structural strength while allowing plenty of light to shine through.
Pro Tip: Slightly vary the thickness of each carved bone. Uniform cuts can appear flat, while subtle differences create a more realistic glowing skeleton effect once illuminated.
Adding the Lower Skeleton Section
The bottom pumpkin completes the illusion by featuring leg bones or hip bones. Large curved bones work particularly well because they remain recognizable from a distance. Keeping this section simple balances the more detailed carving found on the face and torso.
If you prefer a whimsical appearance instead of a frightening one, round the edges of the bones and avoid making the design overly sharp or aggressive.
Lighting Makes Everything Better
Carved pumpkins truly shine after sunset. Proper lighting transforms the display from an ordinary carving project into an unforgettable Halloween decoration.
LED Lights vs Traditional Candles
Battery-powered LED candles have become the preferred choice for most decorators because they are safe, long lasting, and easy to replace. They also produce consistent lighting without open flames.
- Place one light inside each pumpkin.
- Position lights toward the center.
- Test brightness before stacking.
- Adjust placement for even illumination.
Warm lighting complements the orange pumpkin color while emphasizing every carved detail.
Creative Ways to Personalize Your Display
Every skeleton pumpkin stack can have its own personality. Once you understand the basic concept, countless variations become possible.
Ideas to Try
- Add a fun Halloween hat.
- Place decorative autumn leaves around the base.
- Include small lanterns nearby.
- Use faux spider webs for extra atmosphere.
- Decorate with miniature pumpkins.
- Add colorful outdoor lighting.
These simple additions make the display feel complete without overwhelming the carved pumpkins themselves.
Tips for Better Pumpkin Carving
Even simple carving techniques can produce professional-looking results when approached carefully.
- Use sharp carving tools.
- Remove seeds completely.
- Keep carving lines smooth.
- Work slowly around detailed sections.
- Clean pumpkin edges after cutting.
- Test lighting before final assembly.
Important: The strongest Halloween displays rely on contrast. Large glowing openings combined with solid pumpkin sections make the skeleton design easier to recognize from both nearby and across the yard.
Displaying Your Finished Creation
Placement has a major influence on how dramatic your finished decoration appears. Position the pumpkin stack near your front entrance where visitors naturally look as they approach your home.
A dark background helps the glowing carvings stand out. Adding subtle landscape lighting or string lights nearby creates depth without distracting from the pumpkins themselves.
If your porch is covered, your pumpkins may remain fresh longer while staying protected from excessive rain and direct sunlight.
Keeping Pumpkins Fresh Longer
Fresh pumpkins naturally begin to soften over time, but several simple habits can extend their lifespan.
- Store pumpkins in cool conditions before carving.
- Avoid prolonged direct sunlight.
- Keep the carved interior dry.
- Remove standing water after rain.
- Replace lighting batteries as needed.
Refreshing the display every evening with clean lighting keeps it looking vibrant throughout Halloween celebrations.
Quick Points
- Stack three pumpkins for maximum visual impact.
- Combine facial carving with glowing skeleton details.
- Use LED lights for safe nighttime illumination.
- Decorate the surrounding porch for a complete Halloween scene.
- Personalize the design with creative expressions and accessories.
Conclusion
A stacked skeleton pumpkin display transforms classic pumpkin carving into a memorable Halloween centerpiece that captures attention both day and night. The combination of expressive facial features, glowing skeletal patterns, and thoughtful lighting creates an impressive decoration suitable for front porches, parties, and seasonal gatherings.
Whether you are an experienced pumpkin carver or trying your first Halloween DIY project, this creative approach offers plenty of opportunities to customize your design while keeping the process enjoyable. With a little planning, quality pumpkins, and imaginative carving, you can build a festive display that becomes the highlight of your Halloween decorations year after year.
Tags
Pumpkin Ideas Carving Halloween Pumpkin Skeleton Pumpkin DIY Halloween Decor Jack O Lantern Front Porch Decor Halloween Decorations Fall DIY